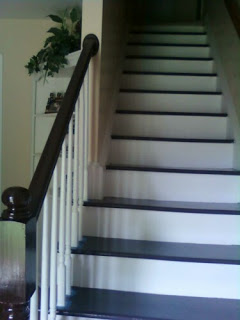
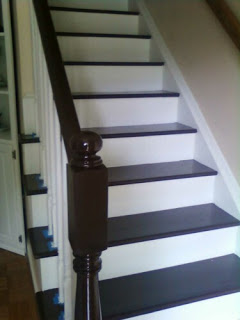
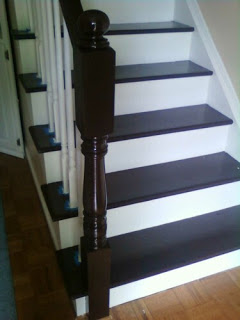
Ok so listen, I’m not finished 100% with this project but I just HAD to show you. Why? Because I.Am.In. L-O-V-E.
A few months ago I saw Rhoda from Southern Hospitality attempt this massive project. When I saw her before and after pictures I just KNEW we had to try this.
And I am so glad we did.
It took almost a month, had to take a break for El Salvador. 🙂 And I could really only work on it at night when the girls were asleep. Because…um….girls and paint on the stairs? Not a good combo. So it was a long project for us.
We still have to take the banister down on the wall and paint it but that will be done soon. I just couldn’t wait to show you!
But the cost? Super cheap.
Paint = $30
sand paper = $5
Brush’s = $10 (note: we opted to buy cheaper brushes to throw away b/c I don’t have the patience nor time to deal with cleaning brushes)
So the total roughly was: $45!
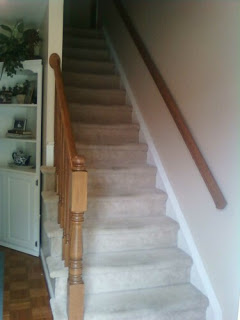
Before:
First we had to take all the carpet off. That was a task.
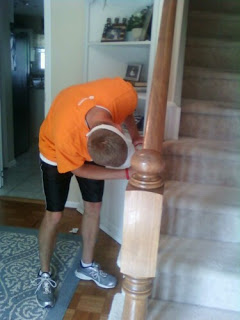
I was so happy to see the condition of the stairs underneath. Just a few spots needed some wood fill but they were ready to be sanded in no time.
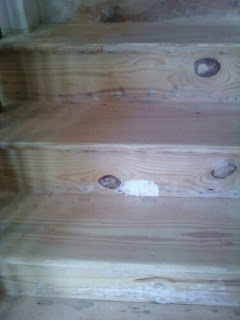
There’s my man. Sanding away. Please note….I DID participate in this…there are just no pictures to prove such things. But this was MY project. [sorta]
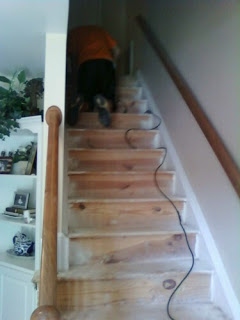 And so sorry but I took NO pictures of the painting process. It wasn’t too brutal. But all we really want to see is the finished project right? [smile]

31 Comments
It DOES look awesome! Great job, Nicki!!!
I just found this wonderful blog, and I am so inspired to do the same with my stairs. I have one question, what did you do with the top stair? how did you transition it, is there carpet in the hallway or room the stairs lead into…? They look great!
Your stairs look amazing! I’m going to do the same with my boring oak stairs. Did you paint the white or black first?
Love it!!! Love it!!!
Awww, Nicki, wow, what a great job! I'm so glad you got inspired to try it too. And your stairs were in great shape under there. Just needed putty & sanding & that gorgeous paint. SO glad you got busy and did it. I know you will really enjoy it. I just might have to do a link over to you & show that off. 🙂
Wow they look fantastic Nicki…kudos to you and Kris!
EXCELLENT. Looks great
Wow, that looks great! Is that paint or stain? I need to do this. I have the oak looking stain (which looks orange to me) and the previous homeowners have a runner going up the stairs – yuck! Anyway, you've inspired me!
It looks fantastic! (I buy the cheap brushes too to throw away 🙂
Thanks y'all! I am super excited about them!! 🙂
Deidre, it is paint. But it's porch and floor paint so it's brutal on the hands. 🙂 I recommend gloves!
If you do it please let me know, I'd LOVE to see it!!
Wow! What a great, inexpensive way to freshen things up! I LOVE the look!
B-utiful!
can't tell, is it black or brown? or maybe my eyes are bad?
Hmmmm I wonder how much K and you would charge me to do this for Steph and Jon? I am serious I can buy the supplies and help too. WHat kinda deal will you give your sweet friend??? Like before Lifetime comes just incase:) Let me know. It looks awesome.
It's super cute!! You are one creative, brave and fun girl!
Very nice… hmmm… now the wheels are turning!
It does look amazing!! I love it – and the numbers would be super cute, too. Which colors did you use?? just wondering.
This is gorgeous. I may have to do this as I was contemplating restaining mine, but dreaded all of the work it requires. Thanks for the inspiration 🙂
Hi Nicki,
Your stairs look great. I am thinking about doing a very similar thing. What I would like to know is , how much did you sand back, especially the upright bannister railings? I am almost to scared to start as I think about how much work it will be.
Just wondering what type of paint you used on the treads of the stairs. Was it glossy or semi gloss? I am planning on doing this to my stairs soon!! I can't wait to rip that carpet off!! I just want to make sure the paint doesn't wear.
I came to see your project and you have certainly inspired me. I saw it featured at Rhoda's. I love the black and white. It makes it a feature instead of just normal. LOVE IT!
They turned out gorgeous! I love them!
Looks Great! I want to attempt this but have no idea what's under our carpet, maybe I'll get brave enough one day down the road.
Numbers on the stairs would be cute, but I'd try something like the vinyl numbers first, so it could be removed easily. Great job!
Hi
Since seeing Rhoda's stairs I am determined to do this to. Yours came out fabulous. I like the black steps.
Hi,
I discovered your blog through Rhodas!
It looks really great! I'm going to attack my carpeted steps very soon.
I was also curious as to what exact primer, paint and sheen you used. I'm assuming you used lots of wood putty. How does the finish look up close? I'm sure mine looks similar to my attic stairs and that means there will be a bunch of screw holes I'll have to fill as well.
Thanks!
I love your stairs! Our attached garage didn't have a door to the house and we're in the process of having one put in. Bigger project than we thought since the garage sits lower than the house and stairs had to be built. I was trying to think about how to finish the stairs and I've fallen in love with your idea!
Wow! That looks so good! My stairs are also pine like that under the carpet.
Question: do you have carpet at the top of the stairs? If so, how did you handle that?
i LOOOOVE THIS…. I have been contemplating for a while and I couldnt decide– but yours look amazing. Have you seen anyone stain the top tread rather than paint?
ps::: amazing. seriously. love this.
I actually did the same thing with the stain color golden oak and I love it however I’m thinking about going just a little bit darker because my furniture is darker in that room
What kind of black paint did you use and did you have anything, like sand, put in to keep from being too slippery?
Beautiful!
Comments are closed.